First install RabbitMQ server. In my case I installed the one from rabbitmq. If you don't have Erlang, it will direct you to the Erlang page. Download and install Erlang, in my case I downloaded OTP 18.3 Windows 64-bit Binary File.
Then in RabbitMQ command prompt write:
rabbitmqctl.bat status
Result should be something like:
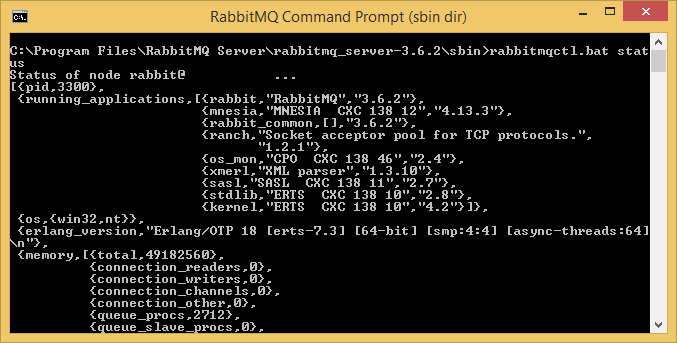
If it is not, try to restart your computer.
Next thing is to setup our management plugin.
In RabbitMQ command prompt write:
rabbitmq-plugins enable rabbitmq_management
If you installed your RabbitMQ on local host as I did, then go to:
Username and password is guest / guest
It can be that plugin is not started immediately and you will have to wait couple of seconds before you see login screen of management plugin.
Download .NET/C# RabbitMQ client library, unzip it.
Now, in visual studio start new console application write code like this:
using System;
using RabbitMQ.Client;
using System.Text;

namespace RabbitMQ
{
  class Program
  {
    static void Main(string[] args)
    {
      var factory = new ConnectionFactory() { HostName = "localhost" };
      using (var connection = factory.CreateConnection())
      {
        using (var channel = connection.CreateModel())
        {
          channel.QueueDeclare(queue: "hello",
                                durable: false,
                                exclusive: false,
                                autoDelete: false,
                                arguments: null);

          string message = "Hello World!";
          var body = Encoding.UTF8.GetBytes(message);

          channel.BasicPublish(exchange: "",
                               routingKey: "hello",
                               basicProperties: null,
                               body: body);
          Console.WriteLine(" [x] Sent {0}", message);
        }
      }
    }
  }
}
In reference list add files:
RabbitMQ.Client.dll
and
RabbitMQ.ServiceModel.dll
Which you previously downloaded and uzip it.
When you execute that code open RabbitMQ management, and you should see something like this:
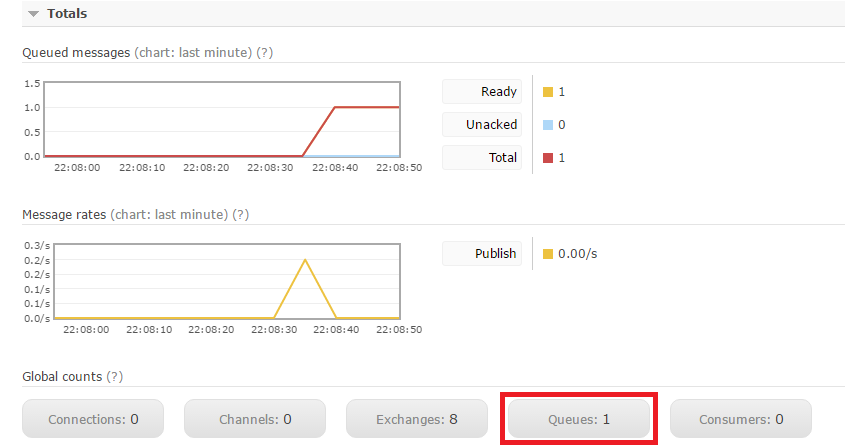
Click on queues button, click on hello

Scroll down and expand get messages
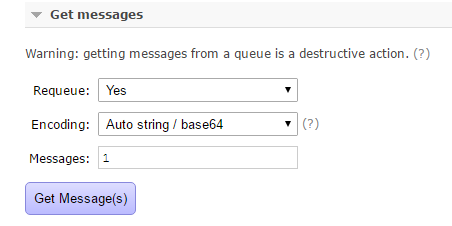
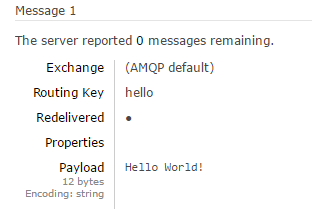
Click on Get messages button, and you should see your message