In this article I will try to write every step of writing browser Jasmine tests.
First I wrote some simple knockout script, which looks like:
HTML:
<!DOCTYPE html>
<html>

	<head>
		<script type="text/javascript" src="/knockout-3.1.0.js"></script>
		<script type="text/javascript" src="/index.js"></script>
	</head>

	<body>
		<p>myJasmineTest:<strong data-bind="text: myJasmineTest"></strong></p>
	</body>

</html>
JS:
var JasmineTestViewModel = function() {
	this.myJasmineTest = ko.observable("test");
}

window.onload = function () {
	ko.applyBindings(new JasmineTestViewModel());
}
Unfortunately with window.onload doesn't work, at this moment I don't know why, instead, I downloaded jQuery, and instead window.onload I wrote:
$(function() {
	debugger;
	ko.applyBindings(new JasmineTestViewModel());
});
As you can see pretty simple. This small script, without Jasmine and without jQuery you can download from here.
We have to download standalone release of Jasmine test. To download I clicked on a zip file then "View Raw", and download started automatically. After unzipping folder structure should look like:
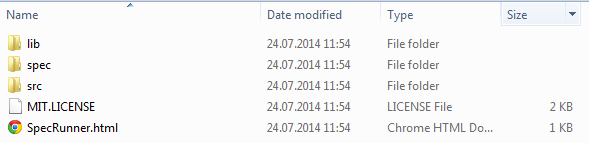
Now, we need SpecRunner.html file and lib folder to copy into folder where is our simple example. In my case I created "test" subfolder in a folder where my main project is.
Next thing, I will create "spec" folder in my "test" folder, where my real tests will be.
In SpecRunner.html file I will delete examples which came with Jasmine. In this moment my SpecRunner looks like:
<!DOCTYPE HTML>
<html>
	<head>
		<meta http-equiv="Content-Type" content="text/html; charset=UTF-8">
		<title>Jasmine Spec Runner v2.0.1</title>

		<link rel="shortcut icon" type="image/png" href="/lib/jasmine-2.0.1/jasmine_favicon.png">
		<link rel="stylesheet" type="text/css" href="/lib/jasmine-2.0.1/jasmine.css">

		<script type="text/javascript" src="/lib/jasmine-2.0.1/jasmine.js"></script>
		<script type="text/javascript" src="/lib/jasmine-2.0.1/jasmine-html.js"></script>
		<script type="text/javascript" src="/lib/jasmine-2.0.1/boot.js"></script>

		<!-- include source files here... -->

		<!-- include spec files here... -->

	</head>

	<body>
	</body>
</html>
I am now ready to start writing my test. Create for example indexSpec.js file in folder spec, and it look like:
describe("Yo! This is a test!", function () {

});
Add it to SpecRunner.html, in my case I just added line:
<!-- include spec files here... -->
<script type="text/javascript" src="/spec/indexSpec.js"></script>
Now we can open file SpecRunner.html, but there will be nothing special.
Next thing which we have to do is to include jQuery, Knockout and our source files, that means in SpecRunner.html add files:
<script type="text/javascript" src="/../knockout-3.1.0.js"></script>
<script type="text/javascript" src="/../jquery-2.1.1.js"></script>

<!-- include source files here... -->
<script type="text/javascript" src="/../index.js"></script>
Now, we can write our first Knockout Jasmine test, which looks like:
describe("Yo! This is a test!", function () {
	it("display 'My first Jasmine test'", function () {
		var	sut = new JasmineTestViewModel();
		expect(sut.myJasmineTest()).toBe("My first Jasmine test");
	});
});
POI's are:
var sut = new JasmineTestViewModel(); - with this I created new view model object
expect(sut.myJasmineTest()).toBe("My first Jasmine test"); - here I am checking result of my observable, brackets I painted red because I already forgot to put then :)
sut is "system under test"
Example download from here.