- Details
- Written by: Stanko Milosev
- Category: WPF
- Hits: 7113
First, lets create one XAML with styles:
<Window x:Class="ResourceDictionary.MainWindow"
        xmlns="http://schemas.microsoft.com/winfx/2006/xaml/presentation"
        xmlns:x="http://schemas.microsoft.com/winfx/2006/xaml"
        Title="MainWindow" Height="350" Width="525">

    <Window.Resources>
        <Style x:Key="myStyle" TargetType="Button">
            <Setter Property="Background" Value="Orange" />
            <Setter Property="FontStyle" Value="Italic" />
            <Setter Property="Padding" Value="8,4" />
            <Setter Property="Margin" Value="4" />
        </Style>
    </Window.Resources>

    <Grid>
        <StackPanel Orientation="Horizontal" VerticalAlignment="Top">
            <Button Style="{StaticResource myStyle}">Styles</Button>
            <Button Style="{StaticResource myStyle}">are</Button>
            <Button Style="{StaticResource myStyle}">cool</Button>
        </StackPanel>
    </Grid>
</Window>
So, first part which you have to notice is:
<Window.Resources>
	<Style x:Key="myStyle" TargetType="Button">
		<Setter Property="Background" Value="Orange" />
		<Setter Property="FontStyle" Value="Italic" />
		<Setter Property="Padding" Value="8,4" />
		<Setter Property="Margin" Value="4" />
	</Style>
</Window.Resources>
With that part we are defining resources, and to use it, we can simply write something like:
Style="{StaticResource myStyle}"
Notice myStyle, this is name of our resource.
Now, lets move that our style to ResourceDictionary.
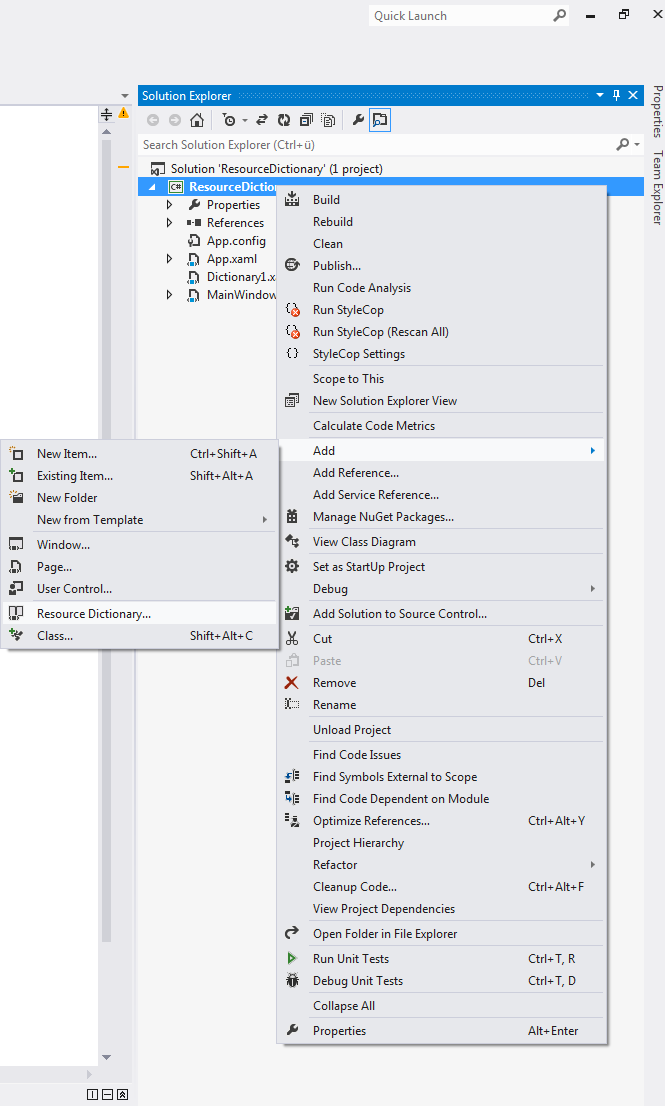
Start new WPF project, in solution explorer right click on the project add -> Resource Dictionary:
Name it as you wish (in my case I name it Dictionary1.xaml), now cut myStyle from MainWindow.xaml and paste it to your dictionary file, in my case it looks like this:
<ResourceDictionary xmlns="http://schemas.microsoft.com/winfx/2006/xaml/presentation"
                    xmlns:x="http://schemas.microsoft.com/winfx/2006/xaml">
    <Style x:Key="myStyle" TargetType="Button">
        <Setter Property="Background" Value="Orange" />
        <Setter Property="FontStyle" Value="Italic" />
        <Setter Property="Padding" Value="8,4" />
        <Setter Property="Margin" Value="4" />
    </Style>
</ResourceDictionary>
In MainWindow.xaml write something like:
<Window x:Class="ResourceDictionary.MainWindow"
        xmlns="http://schemas.microsoft.com/winfx/2006/xaml/presentation"
        xmlns:x="http://schemas.microsoft.com/winfx/2006/xaml"
        Title="MainWindow" Height="350" Width="525">

    <Window.Resources>
        <ResourceDictionary>
            <ResourceDictionary.MergedDictionaries>
                <ResourceDictionary
                  Source= "Dictionary1.xaml">
                </ResourceDictionary>
            </ResourceDictionary.MergedDictionaries>
        </ResourceDictionary>
    </Window.Resources>

    <Grid>
        <StackPanel Orientation="Horizontal" VerticalAlignment="Top">
            <Button Style="{StaticResource myStyle}">Styles</Button>
            <Button Style="{StaticResource myStyle}">are</Button>
            <Button Style="{StaticResource myStyle}">cool</Button>
        </StackPanel>
    </Grid>
</Window>
Note source, and that is all.
- Details
- Written by: Stanko Milosev
- Category: WPF
- Hits: 8566
First you have to download MySQL, today MySQL comes with connectors, also for .NET. Then you have to add MySql.Data.dll reference, in my case MySql.Data.dll was in C:\Program Files (x86)\MySQL\Connector NET 6.8.3\Assemblies\v4.5
Then code behind looks something like:
public MainWindow()
{
	InitializeComponent();

	string MyConString =
	"SERVER=myserver;" +
	"DATABASE=myDb;" +
	"UID=username;" +
	"PASSWORD=pass;Convert Zero Datetime=True";

	string sql = "select * from slam_categories";

	var connection = new MySqlConnection(MyConString);
	var cmdSel = new MySqlCommand(sql, connection);
	var dt = new DataTable();
	var da = new MySqlDataAdapter(cmdSel);
	da.Fill(dt);
	dataGrid1.DataContext = dt;
}
Only thing on which you have to take care is Convert Zero Datetime=True, without that you will receive error:
Unable to convert MySQL date/time value to System.DateTime
XAML looks like
<Window x:Class="WpfApplication6.MainWindow"
        xmlns="http://schemas.microsoft.com/winfx/2006/xaml/presentation"
        xmlns:x="http://schemas.microsoft.com/winfx/2006/xaml"
        Title="MainWindow" Height="350" Width="525">
    <Grid>
        <DataGrid x:Name="dataGrid1" HorizontalAlignment="Left" VerticalAlignment="Top" ItemsSource="{Binding}"/>
    </Grid>
</Window>
In XAML note ItemsSource="{Binding}"
- Details
- Written by: Stanko Milosev
- Category: WPF
- Hits: 8508
These days I was learning autofac, and this article is sort of a product of my learning. This web page I was using for learning, and for writing this article.
Idea was to have two buttons, where one button will send a message to textbox, and another will display message.
In this article, I explained problem which I had, there you can also see my XAML, and in this article I explained hot to create ICommand, so these things I will not explain again.
First we need to add reference to Autofac in our project, I did it with NuGet:

Then we have to prepare our XAML and then we need to prepare our classes with dependency injection in mind.
So, here is how my classes look like:
public interface IOutput
{
	void Write(string content, object obj);
}

public interface IDateWriter
{
	void WriteDate(object obj);
}

public class TodayWriter : IDateWriter
{
	private IOutput _output;
	public TodayWriter(IOutput output)
	{
		this._output = output;
	}

	public void WriteDate(object obj)
	{
		this._output.Write(DateTime.Today.ToShortDateString(), obj);
	}
}

public class TextBoxOutput : IOutput
{
	public void Write(string content, object obj)
	{
		var ioCmessageDisplayTextBox = (TextBox)obj;
		ioCmessageDisplayTextBox.Text = "Hello world! It is: " + content;
	}
}

public class ShowMessageOutput : IOutput
{
	public void Write(string content, object obj)
	{
		MessageBox.Show("Hello world! It is: " + content);
	}
}
As you can see first I created IOutput interface which is like general interface for writing, after that I have created IDateWriter which is going to be "implementation" interface. TodayWriter is the class where all things come together, it is of type IDateWriter, and with constructor dependency injection on IOutput.
ShowMessageOutput and TextBoxOutput are implementations of IOutput interface.
Now, when we prepared our class, we have to prepare our WPF application.
In mainwindow.xaml.cs write following code:
public static IContainer Container { get; set; }

public MainWindow()
{
  InitializeComponent();

  var builder = new ContainerBuilder();
  builder.RegisterType<TodayWriter>().As<IDateWriter>();
  Container = builder.Build();
}
With that we are registering our class where "all things come together", we need that part as sort of a initialization, as much as I understood.
Next code we will use it on methods which are executed on click of button:
var builder = new ContainerBuilder();
builder.RegisterType<ShowMessageOutput>().As<IOutput>();
builder.Update(MainWindow.Container);
WriteDate(obj);
With RegisterType we are deciding which interface implementation will be executed, and with Update we are updating autofac builder.
Also, interesting part of code to notice is:
public static void WriteDate(object obj)
{
  using (var scope = MainWindow.Container.BeginLifetimeScope())
  {
	var writer = scope.Resolve<IDateWriter>();
	writer.WriteDate(obj);
  }
}
Example you can download from here, and here is github branch.
- Details
- Written by: Stanko Milosev
- Category: WPF
- Hits: 6893
While I was learning inversion of control from autofacs example, I got idea to write my application which I will use to "feel" IoC.
So, idea was to have two buttons where one will write a message to console, and second one will write same message to text box window. Idea looked simple, but... Problem was because I wanted to follow MVVM pattern, I have created command, binded click event, then all I had to do was to change textbox text, and that was actually a problem, I couldn't find a way simply to change the value...
Only way which I found was to send an object as parameter, something like:
CommandParameter="{Binding ElementName=IoCmessageDisplayTextBox}"
Where IoCmessageDisplayTextBox is text box on which I want to display my message.
So, here is my XAML:
<Window x:Class="IoCtest.MainWindow"
        xmlns="http://schemas.microsoft.com/winfx/2006/xaml/presentation"
        xmlns:x="http://schemas.microsoft.com/winfx/2006/xaml"
        xmlns:local="clr-namespace:IoCtest"
        Title="MainWindow" Height="350" Width="525">
    <Window.DataContext><local:ClickModel />
    </Window.DataContext>
    <Grid OverridesDefaultStyle="True">
        <Grid.ColumnDefinitions>
            <ColumnDefinition Width="*" />
        </Grid.ColumnDefinitions>
        <Grid.RowDefinitions>
            <RowDefinition Height="*"></RowDefinition>
            <RowDefinition Height="30"></RowDefinition>
        </Grid.RowDefinitions>
        <TextBox x:Name="IoCmessageDisplayTextBox" Grid.Row="0" Grid.Column="0" TextWrapping="Wrap" Text="TextBox" AcceptsReturn="True"  HorizontalScrollBarVisibility="Visible" VerticalScrollBarVisibility="Visible"/>
        <Button Grid.Row="1" Content="Write to memo" Command="{Binding MyClick}" CommandParameter="{Binding ElementName=IoCmessageDisplayTextBox}" Height="30" VerticalAlignment="Bottom"></Button>
    </Grid>
</Window>
Since I already explained how to create button click event using ICommand here, I will not do it again, I will just keep focus on method which will be executed when user clicks button.
Method looks like this:
public void ShowMessage(object obj)
{
  TextBox IoCmessageDisplayTextBox = new TextBox();
  IoCmessageDisplayTextBox = (TextBox)obj;
  IoCmessageDisplayTextBox.Text = "Hello world!";
}
As you can see I had to convert object which I sent as parameter to TextBox, and then I was able to change text property of my TextBox.
Example you download from here, project is prepared for IoC learning, that is why it is more dirty then usual :) I hope that results of my learning I will post soon.