Content:
Step one: The Prism
Step two: The Autofac
Step three: Dependency injection
Step four: Loading categories from Joomla! CMS and displaying them in tree and data view
Abstract:
Idea is to implement application which will be consistent from three modules. Left module will load categories from Joomla! into tree view and data table view, for the sake of using Autofac (we will have same model but two different representations), other two modules will be implemented just for the sake of giving example of Prism.
Introduction
I will use Simple Prism Bootstrapper with autofac and module support, as it is written on that site, installation goes with NuGet like this:
Install-Package Prism.AutofacExtension
Idea behind Prism, imho, is to have modular architecture, that means that different teams can work on same application completely independent from each other. To start my first project in Prism I was using this web page. For this example I downloaded Prism 4.1 - February 2012.
Autofac is dependency injection container, it will make unit test easier, since with autofac you can have classes completely independent from each other. One very good blog about how to create DI container you can find here:
Funq: screencast series on how to build a DI container using TDD
Here and here you can find also my articles about autofac, and to write this article I will use my "never ending project", JoomlaWPF.
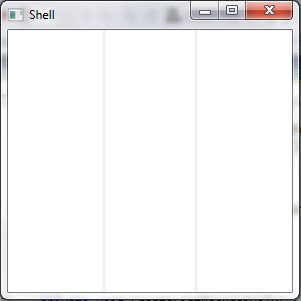
First we will create new project with three regions, on the end it should like this:
Lets start following steps from this web page.
In my case I've created project and I name it AutofacAndPrism, then I deleted MainWindow.xaml, and App.xaml I moved to newly created View folder, also I created ViewModel and Model folder.
Since for this step I am using Prism 4.01 (older version) I will need these files:
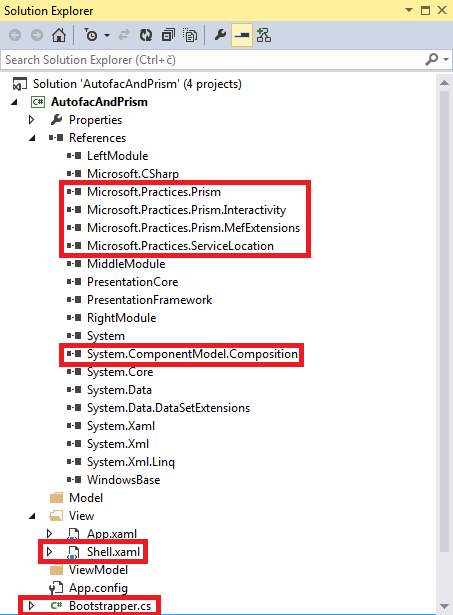
- Microsoft.Practices.Prism.dll
- Microsoft.Practices.Prism.Interactivity.dll
- Microsoft.Practices.Prism.MefExtensions.dll
- Microsoft.Practices.ServiceLocation.dll
Later, when I install Prism.AutofacExtension, I will not need these DLL's since Prism.AutofacExtension will install Prism 5.0 by default. I am using these files because I had some problems with Prism 5.0 which I manually compiled, and since I didn't want to loose too much time on this, concept is same for Prism 4 and Prism 5, for this step I will use Prism 4 as an example.
After downloading Prism, and executing downloaded file, it will ask you in which folder to extract these files. After extracting them, I would recommend saving them in the lib folder of the solution, something like C:\Users\myUserName\Documents\Visual Studio 2013\Projects\AutofacAndPrism\lib. After that add those files to the reference list.
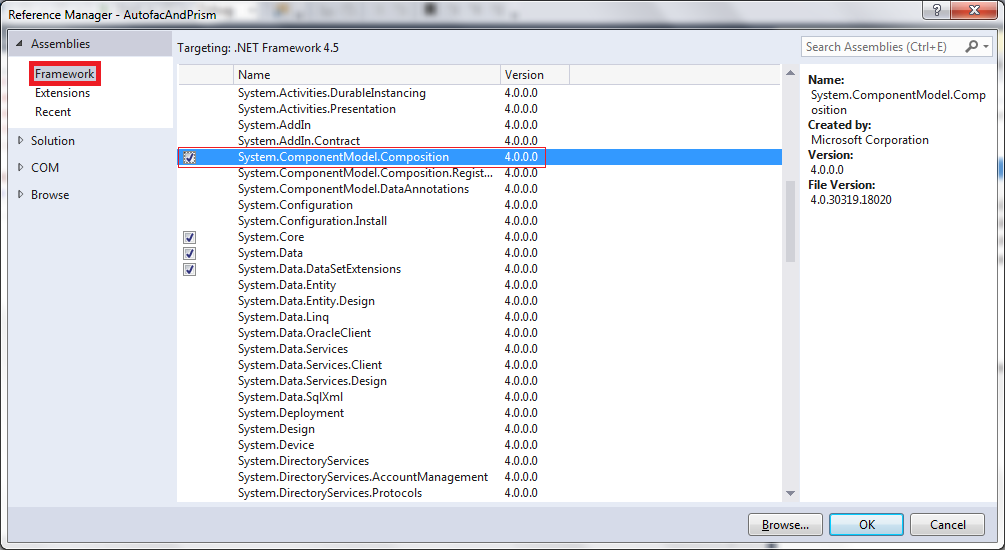
Also, add reference called System.ComponentModel.Composition.dll from Framework Assemblies:
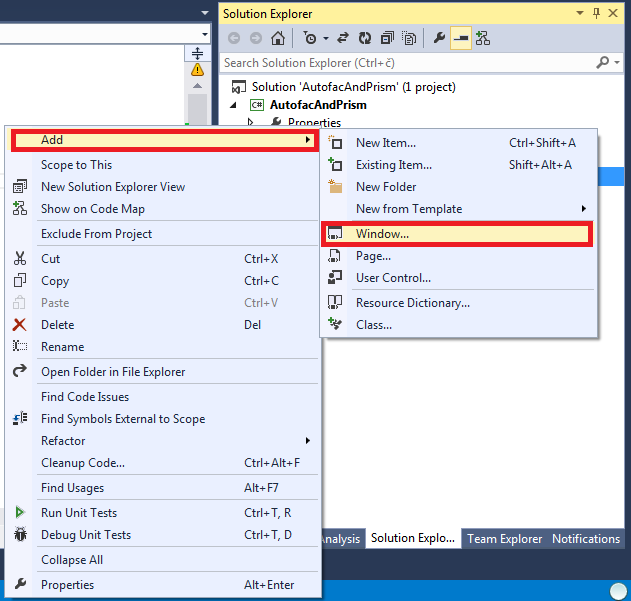
Add new WPF window to the project and name it as Shell:
Open App.xaml file, and delete StartupUri tag from it, so it should look like:
<Application x:Class="AutofacAndPrism.App"
             xmlns="http://schemas.microsoft.com/winfx/2006/xaml/presentation"
             xmlns:x="http://schemas.microsoft.com/winfx/2006/xaml">
    <Application.Resources>

    </Application.Resources>
</Application>
Now open App.xaml.cs, and override OnStartup, so it should look like:
using System.Windows;

namespace AutofacAndPrism
{
  public partial class App : Application
  {
    protected override void OnStartup(StartupEventArgs e)
    {
      base.OnStartup(e);
      Bootstrapper bootstrapper = new Bootstrapper();
      bootstrapper.Run();
    }
  }
}
Add new C# class and name it Bootstrapper.cs
Now, my project structure looks like this:
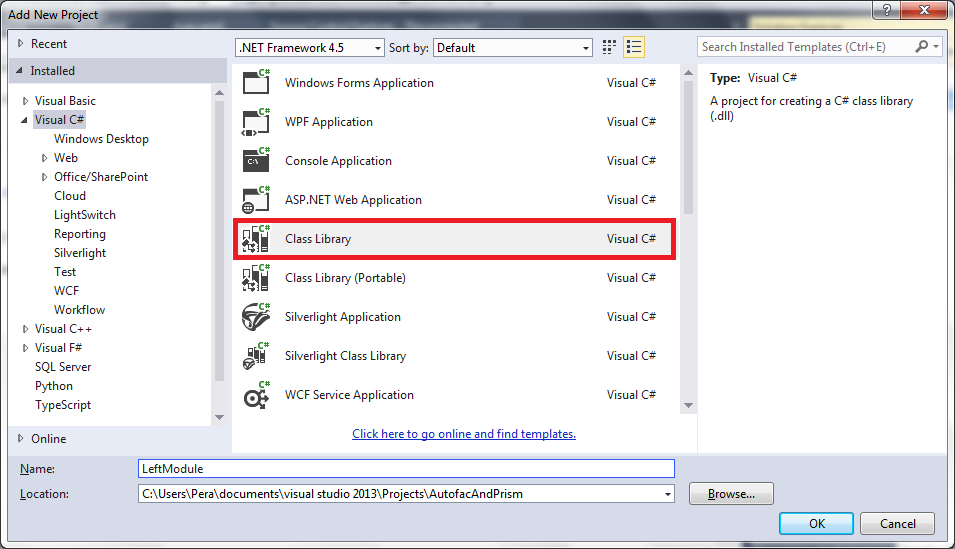
Now I added three class libraries to the solution: LeftModule, MiddleModule and RightModule. Right click on the solution, Add -> New project -> choose class library:
From all three class libraries delete Class1.cs file, and add following references:
- Microsoft.Practices.Prism.dll
- Microsoft.Practices.Prism.Interactivity.dll
- Microsoft.Practices.Prism.MefExtensions.dll
- Microsoft.Practices.ServiceLocation.dll
- System.ComponentModel.Composition.dll
- System.Xaml
Then, to LeftModule I added new class called LeftModule and I implented class as:
using Microsoft.Practices.Prism.MefExtensions.Modularity;
using Microsoft.Practices.Prism.Modularity;

namespace LeftModule
{
  [ModuleExport(typeof(LeftModule))]
  public class LeftModule: IModule
  {
    public void Initialize()
    {

    }
  }
}
Do the same for all other modules (middle and right).
Reference your new class library to the main project:

Now we will implement bootstrapper. Bootstrapper class will take responsibility in initialization of our application.
My Boostrapper.cs looks like this:
using System.ComponentModel.Composition;
using System.ComponentModel.Composition.Hosting;
using System.Reflection;
using System.Windows;
using AutofacAndPrism.View;
using Microsoft.Practices.Prism.MefExtensions;

namespace AutofacAndPrism
{
  public class Bootstrapper: MefBootstrapper
  {
    protected override DependencyObject CreateShell()
    {
      return this.Container.GetExportedValue<Shell>();
    }
    protected override void InitializeShell()
    {
      base.InitializeShell();
      Application.Current.MainWindow = (Shell) this.Shell;
      Application.Current.MainWindow.Show();
    }

    protected override void ConfigureAggregateCatalog()
    {
      base.ConfigureAggregateCatalog();
      var executingAssembly = Assembly.GetExecutingAssembly();
      this.AggregateCatalog.Catalogs.Add(new AssemblyCatalog(executingAssembly));
      this.AggregateCatalog.Catalogs.Add(new AssemblyCatalog(typeof(LeftModule.LeftModule).Assembly));
      this.AggregateCatalog.Catalogs.Add(new AssemblyCatalog(typeof(RightModule.RightModule).Assembly));
      this.AggregateCatalog.Catalogs.Add(new AssemblyCatalog(typeof(MiddleModule.MiddleModule).Assembly));
    }
    protected override CompositionContainer CreateContainer()
    {
      var container = base.CreateContainer();
      container.ComposeExportedValue(container);
      return container;
    }
  }
}
Next thing is to implement our Shell.xaml.
In my case XAML looks like this:
<Window x:Class="AutofacAndPrism.View.Shell"
        xmlns="http://schemas.microsoft.com/winfx/2006/xaml/presentation"
        xmlns:x="http://schemas.microsoft.com/winfx/2006/xaml"
        xmlns:regions="http://www.codeplex.com/CompositeWPF"
        Title="Shell" Height="300" Width="300">
    <Grid>
        <Grid.ColumnDefinitions>
            <ColumnDefinition Width="*"/>
            <ColumnDefinition Width="*"/>
            <ColumnDefinition Width="*"/>
        </Grid.ColumnDefinitions>
        <ContentControl Grid.Column="0" regions:RegionManager.RegionName="LeftRegion"></ContentControl>
        <GridSplitter
                Width="3"
                Grid.Column="1"
                HorizontalAlignment="Left"
                VerticalAlignment="Stretch"
                ResizeDirection="Auto">
        </GridSplitter>
        <ContentControl Grid.Column="1" regions:RegionManager.RegionName="MiddleRegion"></ContentControl>
        <GridSplitter
                Width="3"
                Grid.Column="1"
                HorizontalAlignment="Right"
                VerticalAlignment="Stretch"
                ResizeDirection="Auto">
        </GridSplitter>
        <ContentControl Grid.Column="2" regions:RegionManager.RegionName="RightRegion"></ContentControl>
    </Grid>
</Window>
Point of interest is Prism namespace:
xmlns:regions="http://www.codeplex.com/CompositeWPF"
Region for left module:
<ContentControl Grid.Column="0" prism:RegionManager.RegionName="LeftRegion"></ContentControl>
and same for middle and right module.
Now we can start our application and check if everything is ok.
Next thing we need is our view. I will implement just left view, since other regions I don't have plan to finish...
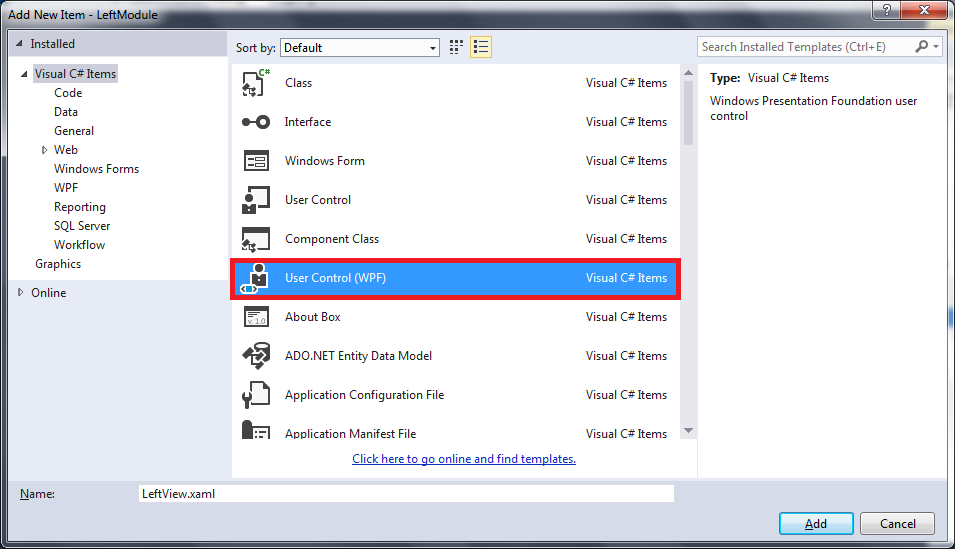
Click with right button on the LeftModule project, create new folder name it View. Right click on that folder, choose "Add new item..." Now choose "User Control (WPF)" and name it LeftView:
I added one label just for test purposes to be sure that everything is working, so XAML looks like:
<UserControl x:Class="LeftModule.View.LeftView"
             xmlns="http://schemas.microsoft.com/winfx/2006/xaml/presentation"
             xmlns:x="http://schemas.microsoft.com/winfx/2006/xaml"
             xmlns:mc="http://schemas.openxmlformats.org/markup-compatibility/2006"
             xmlns:d="http://schemas.microsoft.com/expression/blend/2008"
             mc:Ignorable="d"
             d:DesignHeight="300" d:DesignWidth="300">
    <Grid>
        <Label Content="test"/>
    </Grid>
</UserControl>
Open LeftView.xaml.cs, and write it like:
using System.ComponentModel.Composition;
using System.Windows.Controls;
using Microsoft.Practices.Prism.Regions;

namespace LeftModule.View
{
  [Export("LeftView")]
  [PartCreationPolicy(CreationPolicy.NonShared)]
  [RegionMemberLifetime(KeepAlive = false)]
  public partial class LeftView : UserControl
  {
    [ImportingConstructor]
    public LeftView()
    {
      InitializeComponent();
    }
  }
}
Now LeftModule.cs should look like:
using System.ComponentModel.Composition;
using LeftModule.View;
using Microsoft.Practices.Prism.MefExtensions.Modularity;
using Microsoft.Practices.Prism.Modularity;
using Microsoft.Practices.Prism.Regions;

namespace LeftModule
{
  [ModuleExport(typeof(LeftModule))]
  public class LeftModule : IModule
  {
    [Import]
    public IRegionManager Region { get; set; }
    public void Initialize()
    {
      Region.RegisterViewWithRegion("LeftRegion", typeof(LeftView));
    }
  }
}
We have to register our view, so LeftModuleRegistry.cs will look like:
using Autofac;
using LeftModule.View;

namespace LeftModule
{
  public class LeftModuleRegistry: Module
  {
    protected override void Load(ContainerBuilder builder)
    {
      base.Load(builder);

      builder.RegisterType<LeftModule>();
      builder.RegisterType<LeftView>();
    }
  }

}
Note that I added line builder.RegisterType<LeftView>();
Now if you start the application you should see three region like on picture at beginning with label "test" on the left side.
Solution until this step you can download from here.
Now it is time to introduce the Autofac. Since we prepared almost everything, and after introducing Autofac to our solution, we will change it a little bit, next step will be loading Joomla! categories into the tree view and data table view.
In my case, I went through NuGet package management, and in the search field I just wrote Prism.AutofacExtension:
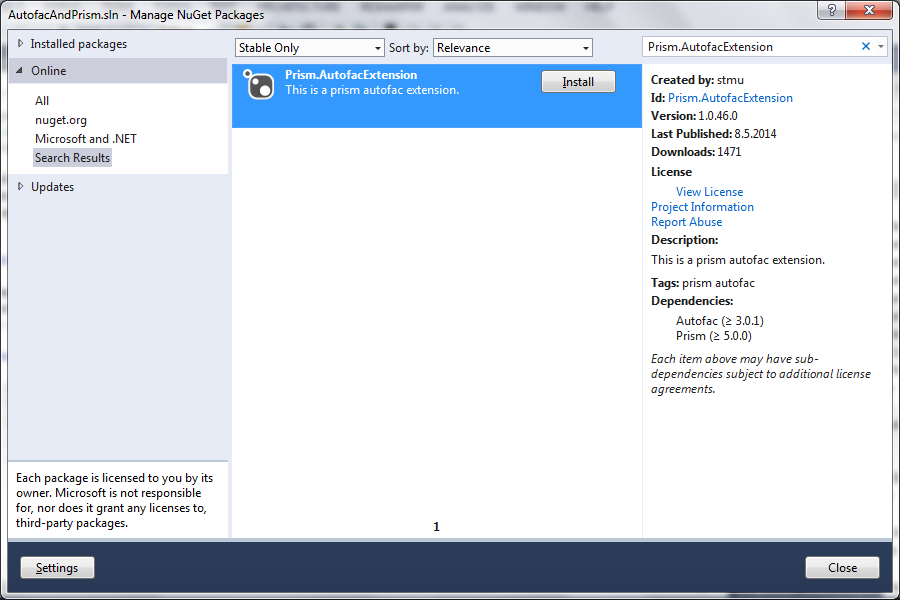
and I install it for all projects:
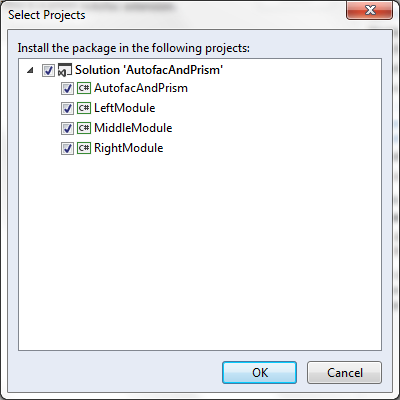
It seems that Prism.AutofacExtension installs newest Prism by default, therefore, if you followed my steps until now delete Microsoft.Practices.Prism from reference list, from all projects.
Change Bootstrapper.cs to look like this:
using System;
using System.Windows;
using Autofac;
using AutofacAndPrism.View;
using LeftModule;
using Microsoft.Practices.Prism.Modularity;
using MiddleModule;
using Prism.AutofacExtension;
using RightModule;

namespace AutofacAndPrism
{
  public class Bootstrapper : AutofacBootstrapper
  {
    protected override void ConfigureContainer(ContainerBuilder builder)
    {
      base.ConfigureContainer(builder);
      builder.RegisterType<Shell>();

      // register autofac module
      builder.RegisterModule<LeftModuleRegistry>();
      builder.RegisterModule<MiddleModuleRegistry>();
      builder.RegisterModule<RightModuleRegistry>();
    }

    protected override void ConfigureModuleCatalog()
    {
      base.ConfigureModuleCatalog();

      // register prism module
      Type typeNewsModule = typeof(LeftModule.LeftModule);
      ModuleCatalog.AddModule(new ModuleInfo(typeNewsModule.Name, typeNewsModule.AssemblyQualifiedName));
    }

    protected override DependencyObject CreateShell()
    {
      return Container.Resolve<Shell>();
    }

    protected override void InitializeShell()
    {
      base.InitializeShell();

      Application.Current.MainWindow = (Shell)this.Shell;
      Application.Current.MainWindow.Show();
    }
  }
}
To each module (left, middle and right), add new corresponding class into the root of each project:
- LeftModuleRegistry
- MiddleModuleRegistry
- RightModuleRegistry
Implement each of these files like:
using Autofac;

namespace LeftModule
{
  public class LeftModuleRegistry: Module
  {
    protected override void Load(ContainerBuilder builder)
    {
      base.Load(builder);

      builder.RegisterType<LeftModule>();
    }
  }

}
That should be all about Prism.Autofacextension, solution until this step you can download from here.
Now it is time to dive into dependency injection.
Step three: Dependency injection
What I want to achieve is to have one method which will load the data, and then that data to represent either in tree view or data table view.
First I will create a model:
using System.Collections.Generic;

namespace LeftModule.Model
{
  public interface IJoomlaCategoriesModel
  {
    int Id { get; set; }
    string Name { get; set; }
    List<IJoomlaCategoriesModel> Children { get; }
  }
}
Interface for loading categories:
using System.Collections.Generic;
using LeftModule.Model;

namespace LeftModule.ViewModel
{
  public interface ILoadCategories
  {
    List<IJoomlaCategoriesModel> LoadJoomlaCategories();
  }
}
Interface for displaying categories:
using System.Collections.Generic;
using LeftModule.Model;

namespace LeftModule.ViewModel
{
  public interface IDisplayCategories
  {
    List<IJoomlaCategoriesModel> DisplayInTreeView();
    List<IJoomlaCategoriesModel> DisplayInDataTableView();
  }
}
Implementation:
using System.Collections.Generic;
using LeftModule.Model;

namespace LeftModule.ViewModel
{
  public class DisplayCategories : IDisplayCategories
  {
    public List<IJoomlaCategoriesModel> CategoriesList { get; set; }

    private ILoadCategories _loadCategories;

    public DisplayCategories(ILoadCategories loadCategories)
    {
      CategoriesList = new List<IJoomlaCategoriesModel>();
      this._loadCategories = loadCategories;
    }
    public List<IJoomlaCategoriesModel> DisplayInTreeView()
    {
      return _loadCategories.LoadJoomlaCategories();
    }

    public List<IJoomlaCategoriesModel> DisplayInDataTableView()
    {
      return _loadCategories.LoadJoomlaCategories();
    }
  }
}
Here notice constructor:
public DisplayCategories(ILoadCategories loadCategories)
{
CategoriesList = new List<IJoomlaCategoriesModel>();
this._loadCategories = loadCategories;
}
Interface ILoadCategories will be (in close future :) ), created and populated with data using Autofac.
Lets now implement properties which we need to start the solution.
Change LeftModuleRegistry to look like:
using Autofac;
using LeftModule.View;
using LeftModule.ViewModel;

namespace LeftModule
{
  public class LeftModuleRegistry: Module
  {
    protected override void Load(ContainerBuilder builder)
    {
      base.Load(builder);

      builder.RegisterType<LeftModule>();
      builder.RegisterType<LoadCategories>().As<ILoadCategories>();
      builder.RegisterType<DisplayCategories>().As<IDisplayCategories>();
      builder.RegisterType<LeftView>().UsingConstructor(typeof(IDisplayCategories));
    }
  }

}
Here notice line:
builder.RegisterType<DisplayCategories>().As<IDisplayCategories>();
with this I said that my interface IDisplayCategories will be populated with data from DisplayCategories implementation. That is why our LeftView.xaml.cs can look like:
public LeftView(IDisplayCategories dataContext)
{
this.DataContext = dataContext;
this.InitializeComponent();
}
We are now almost ready for XAML, implement "LeftView.xaml" like:
<UserControl x:Class="LeftModule.View.LeftView"
             xmlns="http://schemas.microsoft.com/winfx/2006/xaml/presentation"
             xmlns:x="http://schemas.microsoft.com/winfx/2006/xaml"
             xmlns:mc="http://schemas.openxmlformats.org/markup-compatibility/2006"
             xmlns:d="http://schemas.microsoft.com/expression/blend/2008"
             xmlns:treeViewModel="clr-namespace:LeftModule.Model"
             xmlns:datagridViewModel="clr-namespace:LeftModule.ViewModel"
             mc:Ignorable="d"
             d:DesignHeight="300" d:DesignWidth="300">
    <Grid>
        <TabControl>
            <TabItem x:Name="ArticleTree" Header="Tree view">
                <Grid Background="#FFE5E5E5">
                    <TreeView ItemsSource="{Binding CategoriesList}">
                        <TreeView.ItemTemplate>
                            <HierarchicalDataTemplate ItemsSource="{Binding Categories}" DataType="{x:Type treeViewModel:IJoomlaCategoriesModel}">
                                <TreeViewItem Header="{Binding Name}"/>
                            </HierarchicalDataTemplate>
                        </TreeView.ItemTemplate>
                    </TreeView>
                </Grid>
            </TabItem>
            <TabItem x:Name="ArticleTable"  Header="Article table">
                <Grid>
                    <Grid.Resources>
                        <datagridViewModel:LoadCategories x:Key="LoadCategories" />
                    </Grid.Resources>
                    <DataGrid DataContext="{StaticResource LoadCategories}" ItemsSource="{Binding DataGridList}"></DataGrid>
                </Grid>
            </TabItem>
        </TabControl>
    </Grid>
</UserControl>
Then LeftView.xaml.cs should look like:
using System.ComponentModel.Composition;
using System.Windows.Controls;
using LeftModule.ViewModel;
using Microsoft.Practices.Prism.Regions;

namespace LeftModule.View
{
  [Export("LeftView")]
  [PartCreationPolicy(CreationPolicy.NonShared)]
  [RegionMemberLifetime(KeepAlive = false)]
  public partial class LeftView : UserControl
  {
    [ImportingConstructor]
    public LeftView(IDisplayCategories dataContext)
    {
      this.DataContext = dataContext;
      this.InitializeComponent();
    }
  }
}
Example project until this step you can download from here.
Now all we need is to load and display data.
Step four: Loading categories from Joomla! CMS and displaying them in tree and data view
In your "Shell" project, that mean main executable, in my case AutofacAndPrism, open App.config add connection string as I already explained here.
Model will look like:
public interface IJoomlaCategoriesModel
{
	int Id { get; set; }
	string Name { get; set; }
	List<IJoomlaCategoriesModel> Children { get; }
}
We also need implementation of model:
public class JoomlaCategoriesModel: IJoomlaCategoriesModel
{
	private readonly List<IJoomlaCategoriesModel> m_categories;
	public JoomlaCategoriesModel()
	{
		m_categories = new List<IJoomlaCategoriesModel>();
	}
	public int Id { get; set; }
	public string Name { get; set; }

	public List<IJoomlaCategoriesModel> Children
	{
		get { return m_categories; }
	}
}
Here notice how I implemented children:
public List<IJoomlaCategoriesModel> Children
{
get { return m_categories; }
}
Implementation of ILoadCategories:
public class LoadCategories: ILoadCategories
{
	private string JoomlaConStr = ConfigurationManager.ConnectionStrings["JoomlaCon"].ConnectionString;
	public List LoadJoomlaCategories()
	{
		var connection = new MySqlConnection(JoomlaConStr);

		string sql = "select * from slam_categories where level = 0 order by id ";

		var cmdSel = new MySqlCommand(sql, connection);

		connection.Open();

		MySqlDataReader dataReader = cmdSel.ExecuteReader();

		List CategoriesList = new List();
		var i = 0;
		while (dataReader.Read())
		{
			i++;

			CategoriesList.Add(new JoomlaCategoriesModel
			{
				Name = dataReader["title"].ToString(),
				Id = int.Parse(dataReader["id"].ToString())
			});
		}

		CreateListRecursively(CategoriesList);

		return CategoriesList;
	}

	private void CreateListRecursively(List CategoriesList)
	{
		int i = -1;
		foreach (IJoomlaCategoriesModel category in CategoriesList)
		{
			i++;

			var connection = new MySqlConnection(JoomlaConStr);

			string sql = "select * from slam_categories where parent_id = " + category.Id + " order by id ";

			var cmdSel = new MySqlCommand(sql, connection);

			connection.Open();

			MySqlDataReader dataReader = cmdSel.ExecuteReader();

			while (dataReader.Read())
			{
				CategoriesList[i].Children.Add(new JoomlaCategoriesModel
				{
					Name = dataReader["title"].ToString(),
					Id = int.Parse(dataReader["id"].ToString())
				});
			}

			CreateListRecursively(CategoriesList[i].Children);
		}
	}
}
Preparing properties for XAML, implementation of IDisplayCategories:
public class DisplayCategories : IDisplayCategories
{
	public List TreeCategoriesList { get; set; }
	public List DataTableCategoriesList { get; set; }

	private ILoadCategories _loadCategories;
	public DisplayCategories(ILoadCategories loadCategories)
	{
		TreeCategoriesList = new List();
		DataTableCategoriesList = new List();

		this._loadCategories = loadCategories;
		TreeCategoriesList = DisplayInTreeView();
		DataTableCategoriesList = DisplayInDataTableView();
	}

	public List DisplayInTreeView()
	{
		return _loadCategories.LoadJoomlaCategories();
	}

	public List DisplayInDataTableView()
	{
		return _loadCategories.LoadJoomlaCategories();
	}
}
XAML (LeftView.xaml):
<UserControl x:Class="LeftModule.View.LeftView"
             xmlns="http://schemas.microsoft.com/winfx/2006/xaml/presentation"
             xmlns:x="http://schemas.microsoft.com/winfx/2006/xaml"
             xmlns:mc="http://schemas.openxmlformats.org/markup-compatibility/2006"
             xmlns:d="http://schemas.microsoft.com/expression/blend/2008"
             xmlns:joomlaCategoriesModel="clr-namespace:LeftModule.Model"
             xmlns:datagridViewModel="clr-namespace:LeftModule.ViewModel"
             mc:Ignorable="d"
             d:DesignHeight="300" d:DesignWidth="300">
    <Grid>
        <TabControl>
            <TabItem x:Name="ArticleTree" Header="Tree view">
                <Grid Background="#FFE5E5E5">
                    <TreeView ItemsSource="{Binding TreeCategoriesList}">
                        <TreeView.ItemTemplate>
                            <HierarchicalDataTemplate ItemsSource="{Binding Children}" DataType="{x:Type joomlaCategoriesModel:IJoomlaCategoriesModel}">
                                <TreeViewItem Header="{Binding Name}"/>
                            </HierarchicalDataTemplate>
                        </TreeView.ItemTemplate>
                    </TreeView>
                </Grid>
            </TabItem>
            <TabItem x:Name="ArticleTable"  Header="Article table">
                <Grid>
                    <DataGrid ItemsSource="{Binding DataTableCategoriesList}"/>
                </Grid>
            </TabItem>
        </TabControl>
    </Grid>
</UserControl>
LeftView.xaml.cs:
using System.ComponentModel.Composition;
using System.Windows.Controls;
using LeftModule.ViewModel;
using Microsoft.Practices.Prism.Regions;

namespace LeftModule.View
{
	[Export("LeftView")]
	[PartCreationPolicy(CreationPolicy.NonShared)]
	[RegionMemberLifetime(KeepAlive = false)]
	public partial class LeftView : UserControl
	{
		[ImportingConstructor]
		public LeftView(IDisplayCategories dataContext)
		{
			this.DataContext = dataContext;
			this.InitializeComponent();
		}
	}
}
That is all. Example project download from here.