- Details
- Written by: Stanko Milosev
- Category: WPF
- Hits: 4529
First add a canvas:

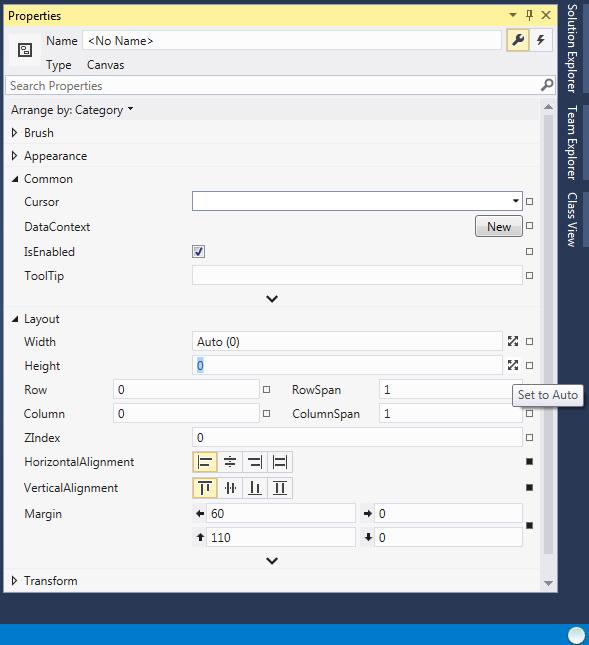
Set width and height to auto:
Add a button.
Now comes a tricky part, at least for me, since I don't know how to delete margins from Visual Studio GUI, so I had to do it manually from XAML. So, here is my XAML:
<Window x:Class="DragNdrop.MainWindow"
        xmlns="http://schemas.microsoft.com/winfx/2006/xaml/presentation"
        xmlns:x="http://schemas.microsoft.com/winfx/2006/xaml"
        Title="MainWindow" Height="350" Width="525">
    <Grid>
        <Canvas Margin="20" HorizontalAlignment="Left" VerticalAlignment="Top">
            <Button Content="Button"
                    PreviewMouseLeftButtonDown="Button_PreviewMouseLeftButtonDown"
                    PreviewMouseLeftButtonUp="Button_PreviewMouseLeftButtonUp"
                    PreviewMouseMove="Button_PreviewMouseMove"/>
        </Canvas>
    </Grid>
</Window>
Notice that margins from button node are deleted, and margin is equal 20 on canvas (Margin="20"), otherwise button will be away from mouse pointer.
Code looks like this:
public partial class MainWindow : Window
{
	private double FirstXPos;
	private double FirstYPos;
	private double FirstArrowXPos;
	private double FirstArrowYPos;
	private object MovingObject;
	public MainWindow()
	{
		InitializeComponent();
	}

	private void Button_PreviewMouseLeftButtonDown(object sender, MouseButtonEventArgs e)
	{
		FirstXPos = e.GetPosition(sender as Control).X;
		FirstYPos = e.GetPosition(sender as Control).Y;
		FirstArrowXPos = e.GetPosition((sender as Control).Parent as Control).X - FirstXPos - 20;
		FirstArrowYPos = e.GetPosition((sender as Control).Parent as Control).Y - FirstYPos - 20;
		MovingObject = sender;
	}

	private void Button_PreviewMouseLeftButtonUp(object sender, MouseButtonEventArgs e)
	{
		MovingObject = null;
	}

	private void Button_PreviewMouseMove(object sender, MouseEventArgs e)
	{
		if (e.LeftButton == MouseButtonState.Pressed && sender == MovingObject)
		{
			(sender as Control).SetValue(Canvas.LeftProperty,
				 e.GetPosition((sender as Control).Parent as Control).X - FirstXPos - 20);

			(sender as Control).SetValue(Canvas.TopProperty,
				 e.GetPosition((sender as Control).Parent as Control).Y - FirstYPos - 20);
		}
	}
}
Code you can download from here, dirty as usual and made in VS 2013
- Details
- Written by: Stanko Milosev
- Category: WPF
- Hits: 4367
<Grid>
	<TextBox Height="194" HorizontalAlignment="Stretch" Name="textBox1" VerticalAlignment="Bottom" TextWrapping="Wrap" AcceptsReturn="True" />
</Grid>
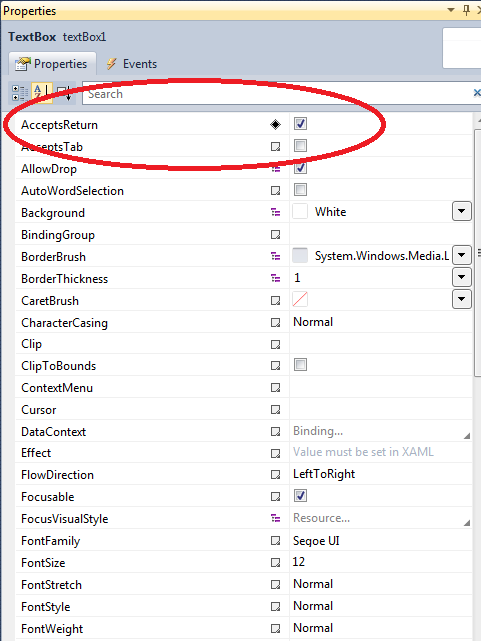
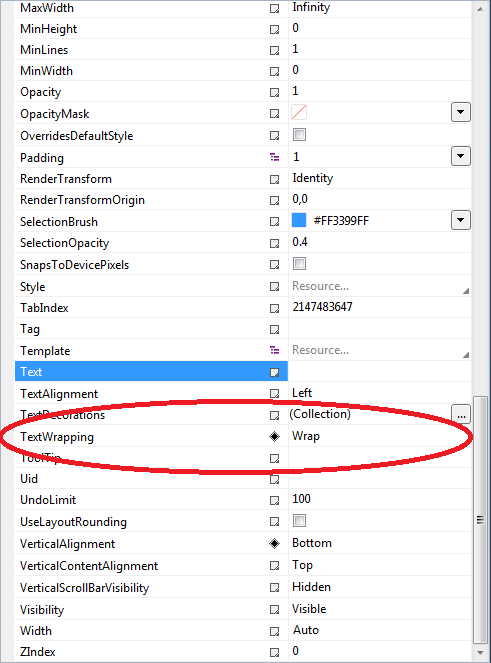
Most important values are:
TextWrapping="Wrap"
and
AcceptsReturn="True"
Or in properties:
and
- Details
- Written by: Stanko Milosev
- Category: WPF
- Hits: 933
After creating new WPF project install Windows Azure Storage through NuGet:
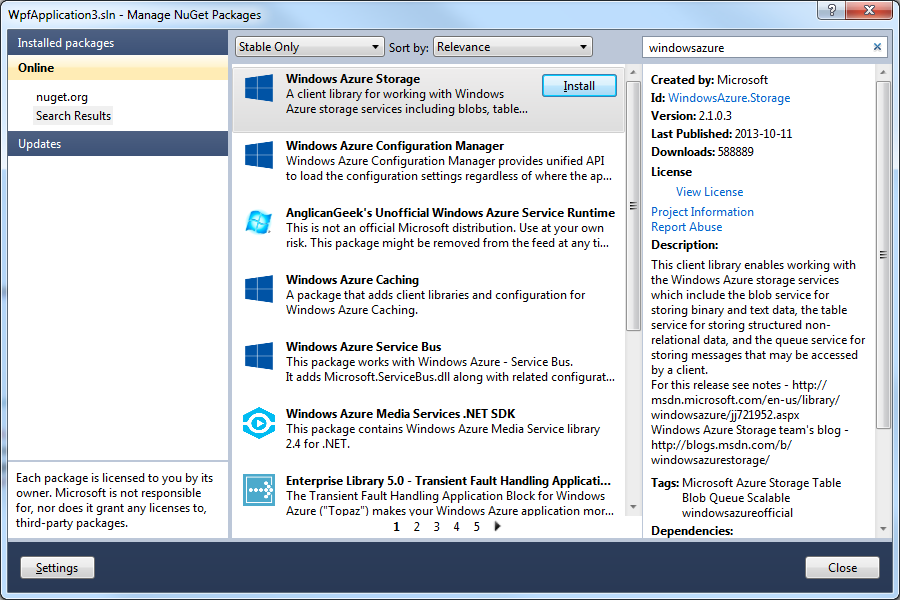
You will need ServiceRuntime also, but that you have to install manually. Right click on "References":
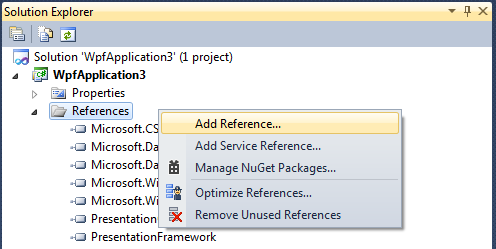
Then click on browse and go, in my case, to C:\Program Files\Microsoft SDKs\Windows Azure\.NET SDK\2012-10\ref. Of course, first you have to install Azure SDK.

In my case, since I need this just as a sample application, add one button, and create click event for that button (double click on the button).
In same file (in my case \WpfApplication3\MainWindow.xaml.cs) add next three lines in your using list:
using Microsoft.WindowsAzure;
using Microsoft.WindowsAzure.Storage;
using Microsoft.WindowsAzure.Storage.Table;
using Microsoft.WindowsAzure.ServiceRuntime;
- Details
- Written by: Stanko Milosev
- Category: WPF
- Hits: 931
Basic idea which I had was to create one button with which I will fill TreeView over XML or MySQL. Problem is that idea which I had was not so simple to implement, because probably can not just "fill" on click tree, but I have to bind... I guess is that I would need to create class for MySQL and over Autofac to update class responsible for binding treeview. Since I need that piece of code to understand autofac better, I will write it here.
First what I did is to implement interface of all interfaces :) that means that this interface will be later used for actual implementation:
public interface IRead
{
	List<string> Read();
}
Then I implemented IReadAndCreateTree like:
public interface IReadAndCreateTree
{
	List<string> ReadXML();
}
Then model where "all things come together":
public class XmlTreeReader : IReadAndCreateTree
{
	private IRead _reader;

	public XmlTreeReader(IRead reader)
	{
		_reader = reader;
	}

	public List<string> ReadXML()
	{
		return this._reader.Read();
	}
}
Now model which I will use for my XAML:
public class XmlTreeReader : IReadAndCreateTree
{
	private IRead _reader;

	public XmlTreeReader(IRead reader)
	{
		_reader = reader;
	}

	public List<string> ReadXML()
	{
		return this._reader.Read();
	}
}
On the end XAML:
<Window x:Class="AutofacTreeView.MainWindow"
        xmlns="http://schemas.microsoft.com/winfx/2006/xaml/presentation"
        xmlns:x="http://schemas.microsoft.com/winfx/2006/xaml"
        xmlns:viewModel="clr-namespace:AutofacTreeView.ViewModel"
        xmlns:model="clr-namespace:AutofacTreeView.Model"
        Title="MainWindow" Height="350" Width="525">
    <Grid>
        <StackPanel>
            <StackPanel.Resources>
                <viewModel:LoadXMLClick x:Key="LoadXMLClick"/>
                <model:TreeViewModel x:Key="TreeViewModel"/>
            </StackPanel.Resources>
            <TreeView x:Name="tvAutofac" DataContext="{StaticResource TreeViewModel}" ItemsSource="{Binding Path=TreeViewModels}" Height="205"/>
            <Button DataContext="{StaticResource LoadXMLClick}" Content="Load XML" Command="{Binding LoadXmlClickCommand}"/>
        </StackPanel>
    </Grid>
</Window>
I hope this is all
