- Details
- Written by: Stanko Milosev
- Category: WPF
- Hits: 4748
XAML:
<Window x:Class="TreeViewAutoExpand.MainWindow"
        xmlns="http://schemas.microsoft.com/winfx/2006/xaml/presentation"
        xmlns:x="http://schemas.microsoft.com/winfx/2006/xaml"
        xmlns:viewModel="clr-namespace:TreeViewAutoExpand.ViewModel"
        xmlns:model="clr-namespace:TreeViewAutoExpand.Model"
        Title="MainWindow" Height="350" Width="525">
    <Grid>
        <Grid.Resources>
            <viewModel:TreeViewAutoExpandViewModel x:Key="TreeViewAutoExpandViewModel" />
        </Grid.Resources>
        <TreeView x:Name="MyTreeView" DataContext="{StaticResource TreeViewAutoExpandViewModel}" ItemsSource="{Binding TreeViewAutoExpandItems}" Loaded="MyTreeView_Loaded">
            <TreeView.ItemTemplate>
                <HierarchicalDataTemplate ItemsSource="{Binding Children}" DataType="{x:Type model:TreeViewAutoExpandModel}">
                    <TreeViewItem x:Name="myTreeViewItem" Header="{Binding Name}"/>
                </HierarchicalDataTemplate>
            </TreeView.ItemTemplate>

        </TreeView>
    </Grid>
</Window>
Thing to notice:
<TreeView x:Name="MyTreeView" DataContext="{StaticResource TreeViewAutoExpandViewModel}" ItemsSource="{Binding TreeViewAutoExpandItems}" Loaded="MyTreeView_Loaded">
Code:
using System.Windows;

namespace TreeViewAutoExpand
{
  using System.Windows.Controls;

  public partial class MainWindow : Window
  {
    public MainWindow()
    {
      InitializeComponent();
    }

    private void ShowSelectedThing(ItemsControl parentContainer)
    {
      // check current level of tree
      foreach (object item in parentContainer.Items)
      {
        TreeViewItem currentContainer = (TreeViewItem)parentContainer.ItemContainerGenerator.ContainerFromItem(item);
        if (currentContainer != null)
        {
          currentContainer.IsExpanded = true;
        }
      }
    }

    private void MyTreeView_Loaded(object sender, RoutedEventArgs e)
    {
      ShowSelectedThing(MyTreeView);
    }

  }
}
Example you can download from here.
- Details
- Written by: Stanko Milosev
- Category: WPF
- Hits: 5597
To write this article I was using this answer.
XAML:
<Window x:Class="TreeViewMouseOverExpand.MainWindow"
        xmlns="http://schemas.microsoft.com/winfx/2006/xaml/presentation"
        xmlns:x="http://schemas.microsoft.com/winfx/2006/xaml"
        xmlns:viewModel="clr-namespace:TreeViewMouseOverExpand.ViewModel"
        xmlns:treeViewModel="clr-namespace:TreeViewMouseOverExpand.Model"
        Title="MainWindow" Height="350" Width="525">
    <Grid>
        <Grid.Resources>
            <viewModel:TreeViewMouseOverExpandViewModel x:Key="TreeViewMouseOverExpandViewModel" />
        </Grid.Resources>

        <TreeView DataContext="{StaticResource TreeViewMouseOverExpandViewModel}" ItemsSource="{Binding TreeViewMouseOverExpandItems}">
            <TreeView.ItemTemplate>

                <HierarchicalDataTemplate ItemsSource="{Binding Children}" DataType="{x:Type treeViewModel:TreeViewMouseOverExpandModel}">
                    <TreeViewItem Header="{Binding Name}"/>
                </HierarchicalDataTemplate>

            </TreeView.ItemTemplate>

            <TreeView.ItemContainerStyle>
                <Style TargetType="{x:Type TreeViewItem}">
                    <Style.Triggers>
                        <Trigger Property="IsMouseOver" Value="True">
                            <Setter Property="IsExpanded" Value="True" />
                        </Trigger>
                    </Style.Triggers>
                </Style>
            </TreeView.ItemContainerStyle>

        </TreeView>
    </Grid>
</Window>
Thing which you have to notice is:
<TreeView.ItemContainerStyle>
	<Style TargetType="{x:Type TreeViewItem}">
		<Style.Triggers>
			<Trigger Property="IsMouseOver" Value="True">
				<Setter Property="IsExpanded" Value="True" />
			</Trigger>
		</Style.Triggers>
	</Style>
</TreeView.ItemContainerStyle>
Here you can download example.
- Details
- Written by: Stanko Milosev
- Category: WPF
- Hits: 5883
Now idea is to expand tree items after some period of time.
XAML:
<Window x:Class="TreeViewMouseOverExpand.MainWindow"
        xmlns="http://schemas.microsoft.com/winfx/2006/xaml/presentation"
        xmlns:x="http://schemas.microsoft.com/winfx/2006/xaml"
        xmlns:viewModel="clr-namespace:TreeViewMouseOverExpand.ViewModel"
        xmlns:treeViewModel="clr-namespace:TreeViewMouseOverExpand.Model"
        Title="MainWindow" Height="350" Width="525">
    <Grid>
        <Grid.Resources>
            <viewModel:TreeViewMouseOverExpandViewModel x:Key="TreeViewMouseOverExpandViewModel" />
        </Grid.Resources>

        <TreeView DataContext="{StaticResource TreeViewMouseOverExpandViewModel}" ItemsSource="{Binding TreeViewMouseOverExpandItems}">

            <TreeView.ItemContainerStyle>
                <Style TargetType="TreeViewItem">
                    <Style.Triggers>
                        <EventTrigger RoutedEvent="MouseEnter">
                            <EventTrigger.Actions>
                                <BeginStoryboard>
                                    <Storyboard>
                                        <BooleanAnimationUsingKeyFrames
                                            Duration="00:00:01"
                                            Storyboard.TargetProperty="(TreeViewItem.IsExpanded)">
                                            <DiscreteBooleanKeyFrame Value="True" />
                                        </BooleanAnimationUsingKeyFrames>
                                    </Storyboard>
                                </BeginStoryboard>
                            </EventTrigger.Actions>
                        </EventTrigger>
                    </Style.Triggers>
                </Style>
            </TreeView.ItemContainerStyle>

            <TreeView.ItemTemplate>

                <HierarchicalDataTemplate ItemsSource="{Binding Children}" DataType="{x:Type treeViewModel:TreeViewMouseOverExpandModel}">
                    <TreeViewItem Header="{Binding Name}">

                    </TreeViewItem>

                </HierarchicalDataTemplate>

            </TreeView.ItemTemplate>

        </TreeView>
    </Grid>
</Window>
Example download from here.
---
Problem with above example is that after executing event trigger you will not be able to change any property (that means that expand / collapse will not work anymore). Solution is in FillBehavior="Stop" (see How to: Set a Property After Animating It with a Storyboard), but, I wouldn't write this article if there is no at least one "but" :), I didn't find proper solution, until now, problem is that if you FillBehavior="Stop" in MouseEnter then trigger will not work at all... if you implement MouseLeave trigger with FillBehavior="Stop", then it will partly work with strange behavior...
In my case, for our product I implemented TreeViewItem.PreviewDragEnter (without FillBehavior="Stop"), and then TreeViewItem.MouseLeave with FillBehavior="Stop", so I have two different triggers on which I could respond... but for MouseEnter / MouseLeave I don't have clear idea how to do it without some hacking in code behind...
- Details
- Written by: Stanko Milosev
- Category: WPF
- Hits: 35638
In this article I will make a WPF project with categories from Joomla! displayed as tree view.
Create new WPF project, in my case I name it TreeViewDetailed. First I will load top level categories. For this part we will need just treeview, XAML looks like this:
<Window x:Class="TreeViewDetailed.View.MainWindow"
        xmlns="http://schemas.microsoft.com/winfx/2006/xaml/presentation"
        xmlns:x="http://schemas.microsoft.com/winfx/2006/xaml"
        xmlns:viewModel="clr-namespace:TreeViewDetailed.ViewModel"
        xmlns:system="clr-namespace:System;assembly=mscorlib"
        Title="MainWindow" Height="350" Width="525">
    <Grid>
        <Grid.Resources>
            <viewModel:TreeViewDetailedViewModel x:Key="TreeViewDetailedViewModel" />
        </Grid.Resources>
        <TreeView DataContext="{StaticResource TreeViewDetailedViewModel}" ItemsSource="{Binding CategoriesList}"/>
    </Grid>
</Window>
Here notice how I declared TreeView:
<TreeView DataContext="{StaticResource TreeViewDetailedViewModel}" ItemsSource="{Binding CategoriesList}"></TreeView>
Now, we will need model for our CategoriesList property:
public class CategoriesListModel
{
	public string Name { get; set; }
	public int Id { get; set; }
	public List<CategoriesListModel> Categories { get; set; }
}
Note line:
List<CategoriesListModel> Categories { get; set; }
That is because each category can have parent category, in this first part we don't need that line, we will need it later when we start loading leafs (tree view items).
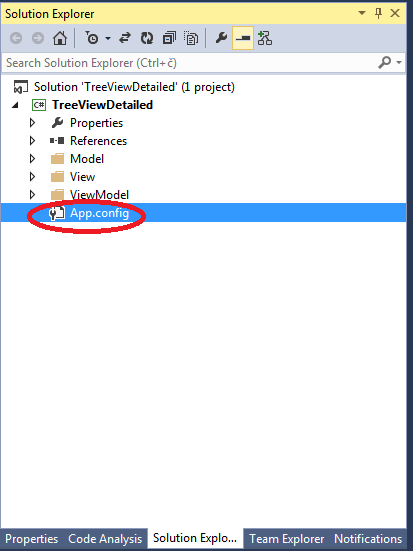
Next thing is view model which we have to define. First lets declare connection string which we will use to connect to our Joomla! MySQL database. Open App.config file:
...and write your connection string in my case App.config looks like this:
<?xml version="1.0" encoding="utf-8" ?>
<configuration>

  <connectionStrings>
    <add name="JoomlaCon"
      connectionString="
        SERVER=myServer;
        DATABASE=myDatabase;
        UID=myUid;
        PASSWORD=myPass;
        Convert Zero Datetime=True;
      "
    />
  </connectionStrings>

    <startup>
        <supportedRuntime version="v4.0" sku=".NETFramework,Version=v4.5" />
    </startup>
</configuration>
Here note:
Convert Zero Datetime=True
without that you will receive error:
Unable to convert MySQL date/time value to System.DateTime
As I already explained here.
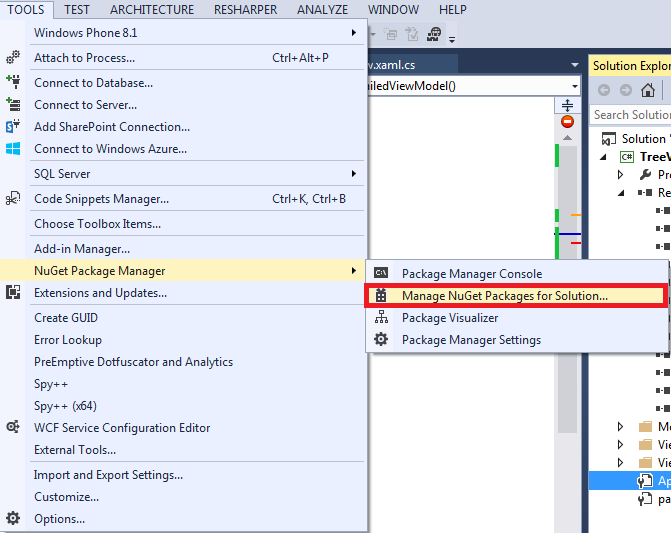
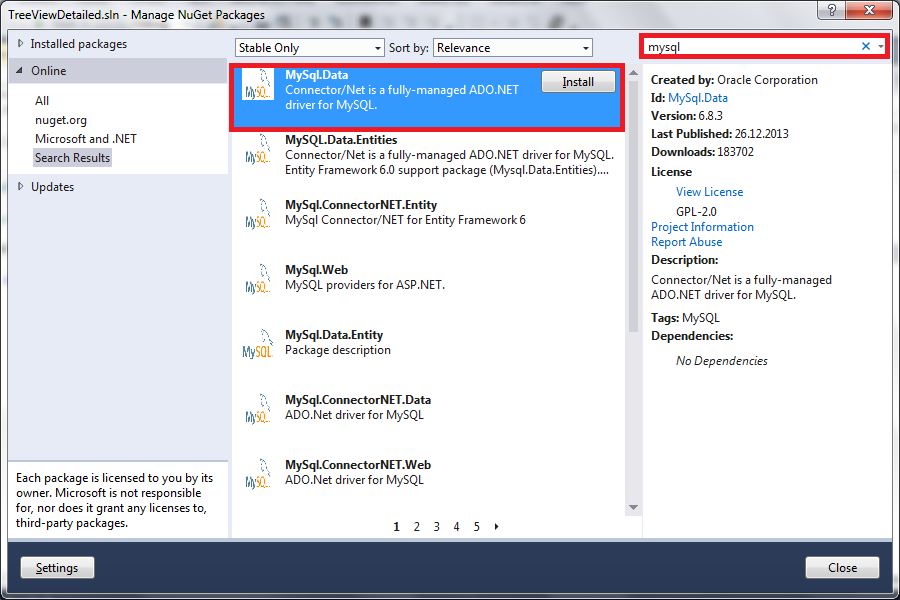
Next thing which you will need is to add mySql support to your references, you can download it as I explained here, or you can install it over nuget:
Then search for mySql:
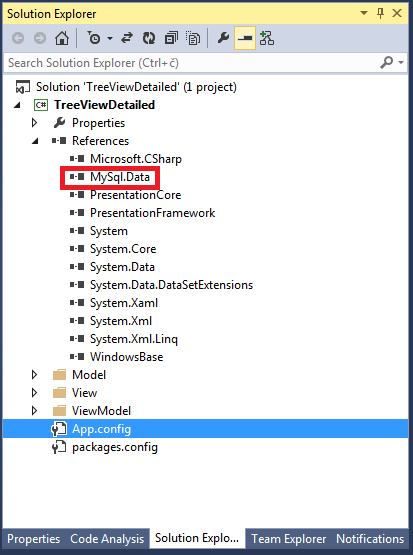
After that your reference list should look like:
Now we can start building our view model:
public class TreeViewDetailedViewModel
{
	private string JoomlaConStr = ConfigurationManager.ConnectionStrings["JoomlaCon"].ConnectionString;
	public List<CategoriesListModel> CategoriesList { get; set; }
	public TreeViewDetailedViewModel()
	{
		var connection = new MySqlConnection(JoomlaConStr);

		string sql = "select * from jos_categories where level = 0 order by id ";

		var cmdSel = new MySqlCommand(sql, connection);

		connection.Open();

		MySqlDataReader dataReader = cmdSel.ExecuteReader();

		CategoriesList = new List<CategoriesListModel>();
		var i = 0;
		while (dataReader.Read())
		{
			i++;

			CategoriesList.Add(new CategoriesListModel
			{
				Name = dataReader["title"].ToString(),
				Id = int.Parse(dataReader["id"].ToString())
			});
		}
	}
}
Here note line:
private string JoomlaConStr = ConfigurationManager.ConnectionStrings["JoomlaCon"].ConnectionString;
with ConfigurationManager.ConnectionStrings["JoomlaCon"].ConnectionString we are calling connection string which we defined in App.config
then note line:
private List<CategoriesListModel> CategoriesList;
as you can see our CategoriesList property is defined as list of CategoriesListModel.
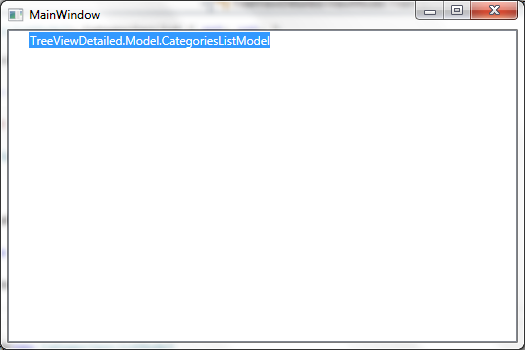
Now, when you start the application you should see something like:
Next thing which we will need is to display nodes in some human readable format.
We will achieve this if we change our XAML to:
<Window x:Class="TreeViewDetailed.View.MainWindow"
        xmlns="http://schemas.microsoft.com/winfx/2006/xaml/presentation"
        xmlns:x="http://schemas.microsoft.com/winfx/2006/xaml"
        xmlns:viewModel="clr-namespace:TreeViewDetailed.ViewModel"
        xmlns:system="clr-namespace:System;assembly=mscorlib"
        xmlns:treeViewModel="clr-namespace:TreeViewDetailed.Model"
        Title="MainWindow" Height="350" Width="525">
    <Grid>
        <Grid.Resources>
            <viewModel:TreeViewDetailedViewModel x:Key="TreeViewDetailedViewModel" />
        </Grid.Resources>
        <TreeView DataContext="{StaticResource TreeViewDetailedViewModel}" ItemsSource="{Binding CategoriesList}">
            <TreeView.ItemTemplate>
                <HierarchicalDataTemplate ItemsSource="{Binding Categories}" DataType="{x:Type treeViewModel:CategoriesListModel}">
                    <TreeViewItem Header="{Binding Name}"/>
                </HierarchicalDataTemplate>
            </TreeView.ItemTemplate>
        </TreeView>
    </Grid>
</Window>
Note that I added lines:
<TreeView.ItemTemplate>
	<HierarchicalDataTemplate ItemsSource="{Binding Categories}" DataType="{x:Type treeViewModel:CategoriesListModel}">
		<TreeViewItem Header="{Binding Name}"/>
	</HierarchicalDataTemplate>
</TreeView.ItemTemplate>
In these lines, notice:
<HierarchicalDataTemplate ItemsSource="{Binding Categories}" DataType="{x:Type treeViewModel:CategoriesListModel}">
Where Categories is (recursive) property defined in CategoriesListModel, and then:
<TreeViewItem Header="{Binding Name}"/>
This first step you can download from here.
Now, we have to change our view model so that we load all leafs, so first our categories list we will fill like this:
CategoriesList.Add(new CategoriesListModel
{
	Name = dataReader["title"].ToString(),
	Id = int.Parse(dataReader["id"].ToString()),
	Categories = new List<CategoriesListModel>()
});
Note that I added line Categories = new List<CategoriesListModel>().
Next thing which we need is recursive load of leafs:
private void CreateListRecursively(List<CategoriesListModel> CategoriesList)
{
	int i = -1;
	foreach (CategoriesListModel category in CategoriesList)
	{
		i++;

		var connection = new MySqlConnection(JoomlaConStr);

		string sql = "select * from jos_categories where parent_id = " + category.Id + " order by id ";

		var cmdSel = new MySqlCommand(sql, connection);

		connection.Open();

		MySqlDataReader dataReader = cmdSel.ExecuteReader();

		while (dataReader.Read())
		{
			CategoriesList[i].Categories.Add(new CategoriesListModel
			{
			Name = dataReader["title"].ToString(),
			Id = int.Parse(dataReader["id"].ToString()),
			Categories = new List<CategoriesListModel>()
			});
		}

		CreateListRecursively(CategoriesList[i].Categories);
	}
}
And that is all... Example project you can download from here.